To replenish Echo Shards, start with an unlocked boss rematch you can clear reliably. Mix in Dungeons and Rifts when you also need books or equipment. After the story, consider an active Soul Storm; return to your regular routes when none is running.
These are choices by progress and purpose, not a measured efficiency ranking.
Choose a route for your current progress
| Your situation | Candidate | What to consider |
|---|---|---|
| You have unlocked a revived boss | A familiar boss rematch | Count travel and restarting as well as the fight |
| You also need books or equipment | A Dungeon or Rift shown on the map | Pursue several useful rewards during the same trip |
| Story complete, event active | Soul Storm | Bring enough survivability and mobility for the timed objectives |
| No event active | Boss rematches, Dungeons or Rifts | Switch routes instead of waiting indefinitely |
Begin with a fight you can finish consistently. A fast kill that often ends in failure may be harder to sustain than a comfortable rematch.
Main ways to obtain Echo Shards
Collect Echo Shards by completing Dungeons and Rifts, defeating bosses, and participating in Soul Storms. Dungeons and Rifts also let you pursue Enchantment Books during the same trip.
Defeating Soul Corrupted mobs is another source of shards. This does not mean every ordinary mob always drops them.
These routes overlap. A boss fought inside a Soul Storm is not a reason to add two separate guaranteed shard amounts for “boss rewards” and “event rewards.”
Boss rematch routes and unlock requirements
After completing the prerequisite quest, use the corresponding rune statue to start the rematch. Check the requirements and statue landmarks below, then choose a familiar fight. The order is not an efficiency ranking.
| Boss | Complete first | Statue landmark |
|---|---|---|
| Witch | Corruption in the Woods | Howling Woods, near the minecart at the Deep Dark entrance. |
| Twisted Warden | Down into the Deep Dark | At the far end of the Deep Dark. |
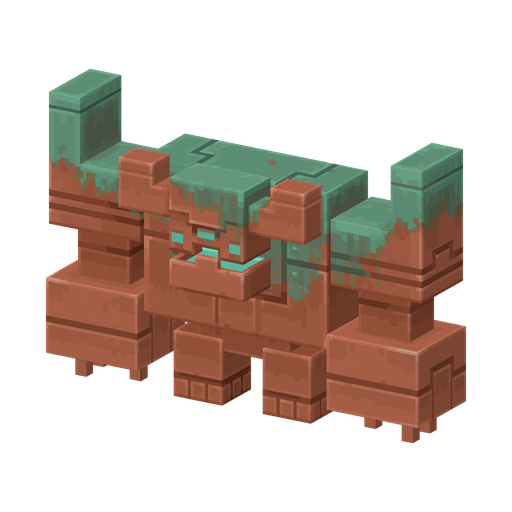 Copper Monstrosity |
Wading Rainy Plains | Rainy Plains, on top of the Supreme Evoker's tower. |
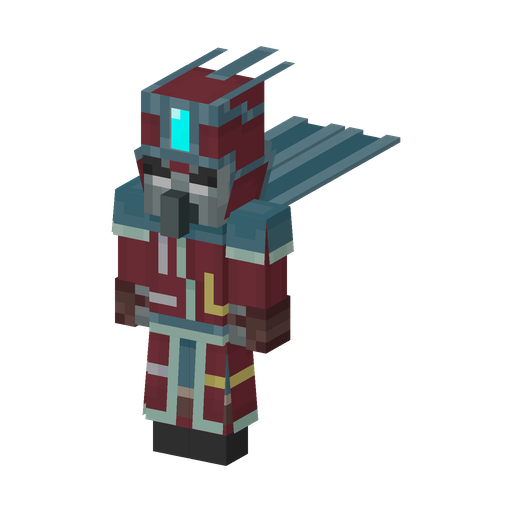 The Prime Enchanter |
Hiking Frozen Highlands | The roof of the Frozen Fortress. |
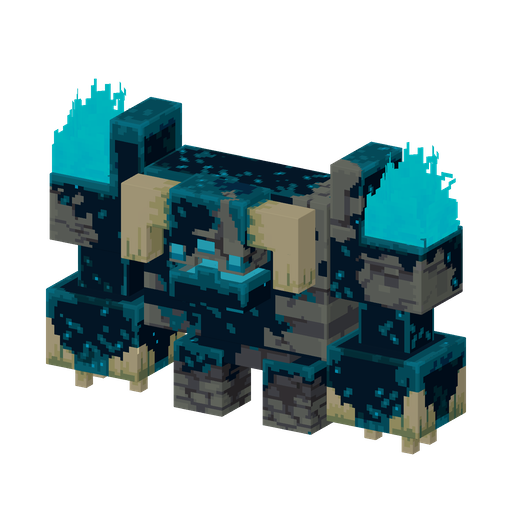 Sculk Monstrosity |
A Monstrosity in the Meadow | Eastern Singer's Meadow. |
Being replayable does not guarantee the same shard count every time. Do not count first-completion equipment as a guaranteed reward on every run.
To reach the Prime Enchanter’s statue, follow the route through the Frozen Fortress from its entrance. Treat the first journey to the statue separately from repeated fights after reaching it.
Starting a Witch rematch
- Check that you have completed Corruption in the Woods.
- Travel to the rune statue near the minecart at the Deep Dark entrance in Howling Woods.
- Interact with the statue and follow its rematch prompt. Use the controls displayed for your platform.
- Defeat the Soul Corrupted Witch that appears.
- Collect the loot and check your Echo Shards balance in the menu.
- To continue, return to the statue and check that it is ready to accept another rematch.
Check the statue’s prompt before starting another fight. Include travel and collection when deciding whether this is a comfortable route to repeat.
Dungeons and Rifts for books as well as shards
Both activities offer Enchantment Books and Echo Shards, making them useful when you want to expand your book collection while replenishing currency.
- Open the map and look for currently available Dungeons and Rifts.
- Pick one you can reach and complete reliably.
- Clear the encounter and collect its rewards.
- Check the map for your next destination, rather than assuming the same entrance or layout will remain.
Dungeon and Rift locations change between sessions. Saving, returning to the main menu and resuming redistributes them on the map. This does not guarantee that the same entrance, layout or rewards return. Check the map again after resuming.
After the story: consider active Soul Storms
Soul Storms become an option after the core quest The Final Souldown. Find the ongoing event on your map. If none is shown, return to a boss, Dungeon or Rift route.
- Locate the active Soul Storm on the map and travel there.
- Check its remaining time and Storm Generator objective.
- Deal with the enemies while destroying generators. Destroy a Shield Generator first when it is protecting a Storm Generator.
- Finish the objective, collect rewards and check your shard balance.
Destroy three Storm Generators within the time limit to clear the event. Keep track of the objective and remaining count on your screen.
Combat efficiency during an event and efficiency across an entire play session are different: waiting also takes time. Consider an active event, then switch back to regular routes when none is running. Do not plan around an assumed fixed interval or guaranteed yield.
Compare the whole loop
Compare travel → accepting the rematch → combat → collection → starting again, including recovery after failures and any wait for another rematch. For Soul Storms, distinguish time spent inside the event from time including the wait for it.
- Slow single-target fights: check whether you can sustain your main attack.
- Getting stuck in groups: review crowd handling and recovery after taking damage.
- Long travel: compare a nearby unlocked route.
- Frequent failures: prioritize survival and return to a manageable encounter.
Use the Equipment Effects List to look up effects and the Equipment Effects Optimization Guide to weigh choices. Equipment drop-rate and loot-duplication effects are not assumed to apply to Echo Shards.
Carrying limit and uses
You can carry a maximum of 100 Echo Shards. Near that limit, consider spending on something you need before another run. A balance change close to the cap is not comparable to an uncapped run's yield.
| Vendor | Echo Shards uses | Keep separate |
|---|---|---|
| Blacksmith | Vendor levels and equipment-effect rerolls | Item-power upgrades use emeralds |
| Enchantsmith | Vendor levels, applying enchantments from books, and improving enchantments | Applying and improving enchantments also involves Enchantment Points |
| Town Merchant | Vendor levels and paid immediate stock refreshes | Buying items uses emeralds |
Stock refreshes can also be free. Rerolling, applying an enchantment and upgrading a vendor are separate operations, so check each displayed cost before confirming.
Reserve shards for the feature you need next, then consider improvements or rerolls for equipment you intend to keep. Maximizing every vendor is not a universal prerequisite. This guide covers replenishment; the effects list and optimization guide above cover what the effects do and how to choose them.